

Supported functionality between the 2 systems:
-
Retrieve bookings on the SmartPOS / workstation (bookings can either be retrieved either as a list or on table floor plan)
-
View customer booking details
-
Create local customer accounts in Bepoz (for any non-Bepoz member)
-
Retrieves payments / deposits made against a booking
-
Create walk-in from SmartPOS
-
Walk-in information is sent to NowBookIt
-
For walk-ins created in NBI, the POS retrieve them, as any other reservation on the POS.
-
For Walk-in created on POS, it send the walk-in information (table number , customer name, email address or phone) to NBI which creates a walkin in NBI as well.
-
On POS, to create a walk-in, with will receive a list of available tables from NBI and display them to the operator to choose from available tables at that time. So there will not be any instance where tables are not associated to a walk in created at POS.
-
-
-
Map and sync table course status between Bepoz and NowBookIt (ex: Entree, Mains, Dessert etc)
-
Transferring tables within a section (this is support when the table is moved either from Bepoz or NowBookIt)
-
Transferring tables to a different table group (this is currently supported when the table is moved in NowBookIt diary, however in our upcoming release table transfers from SmartPOS will also be supported)
-
Supports NowBookIt voucher redemption
-
Sending sales information across to NowBookIt when the table is closed in Bepoz
API keys and set up to map services, layouts and statuses must be completed prior to use, by Bepoz.
Bookings:
As part of the set up for the integration services and layouts from NBI will be mapped in Bepoz.
Buttons like these will appear in your SmartPOS pertaining to your sections and services in NBI.


When a booking is created in NBI, these are then surfaced in the POS in their respective sections and services (this will also depend on how the venue would like to configure their POS).

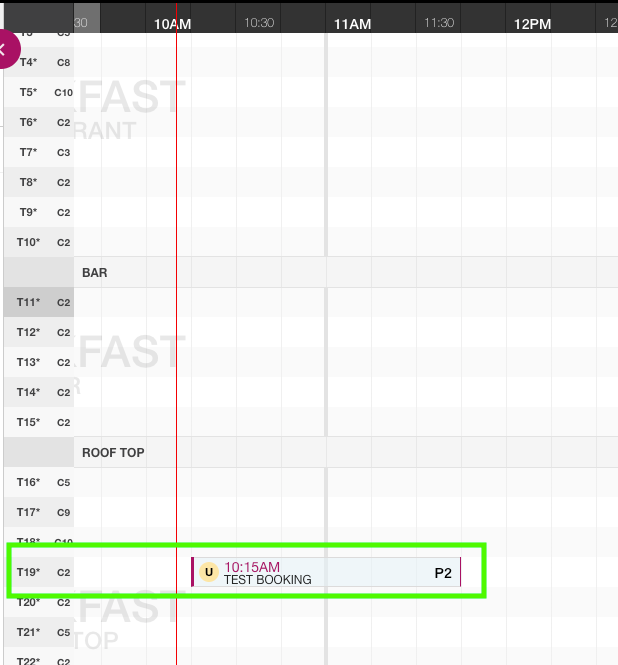
The booking in NBI is located in the Rooftop section.
When I select the Rooftop section on SmartPOS, it will show the list of bookings for the day in Time based chronological order of when they are due.

Select your booking from the SmartPOS, to open your table and seat the customer when they arrive.

Add the order items to the table and select Save & Send, these items will then be returned to NBI via the API and stored against the booking and customer in NBI for customer profiling.
The customer will show as seated in NBI and in the POS.


To continue adding items to the table, follow the same steps.
When you would like to close off the table and complete the booking, again open the table in SmartPOS and select Pay from SmartPOS.

Select your payment method to complete the payment screen

If the table wishes to pay, but are still sitting at the table, you can still keep the booking as seated, take payment and not close the table until they have completed - by selecting NO
OR
You can close the table at this time with the following screen - by selecting Yes.

If the table remains seated, you just need to select the table again at the time of their departure and you will be promoted with the follow screen to now close off the booking in SmartPOS and also in NBI.


If you now navigate to your Dashboard in NBI and go to the guests area, you can see the list of bookings and the items purchased for each booking, that has now been stored from the SmartPOS in to NBI.

Partially seating bookings:
For venues that use Partially Seated status in venue, when statuses are mapped in SmartPOS there is a setting to not auto seat (meaning change the status to seated) upon opening the table and adding items.
If you change the status to Partially Seated in NBI, this will then remain as Partially Seated until all guests on the table arrive.
-
If the 'Auto Seat' is turned ON, then when a booking is opened on SmartPOS, it auto transitions to 'Seated' based on the flag below.
-
If the flag is turned off, the booking remains in 'Unconfirmed / Confirmed' status. Though the table is open in Bepoz, we do not send a status update to NBI that it is already seated.

Bepoz sends a request to NBI to get latest status of all reservations whenever the Operator opens the booking list.
if you open a table in Bepoz --> it remains in the same status as it was before (in this partially seated).
If the table status is then updated in NBI then when the operators opens the booking list next time, it will show the updated status from NBI.
The only to way to update the table status from POS is via using the Mains away or course away function buttons and these will need to be mapped accordingly in SmartPOS.
Changes made in NBI will be reflected in SmartPOS as you transition through the booking, so if you change to Seated from Partially Seated this will also be reflected in the POS.
Walk ins:
Please note: If you are using the Standby list feature in NBI or the Waitlist, these bookings are not shown until they are moved from the Waitlist/Standby list and have a table allocated to them, you will then see them appear in SmartPOS- It will not pick up any bookings while these are on the lists until the time of the table being assigned.
You can create Walkins either from SmartPOS or from NBI.
Create Walkins via SmartPOS:
You can create Walkins via Bepoz by selecting the section and selecting the walk in button

You can also use the floor plan view in SmartPOS to open the specific table you would like to do the walk in on.


Tables that do not already have a booking on them, will be available from the list for selection so this doesn't cause an overlap in NBI.
The list of tables is shown like below - you can also see from here which tables have been assigned as Walkin only in NBI under Layouts, as these will show as True.

You will notice that table 19 is not shown in the list, this is due to there already being a booking in NBI.
Select the table that you would like to create the walk in on

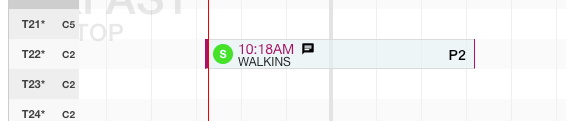
Enter the customer name if you have it or just label it Walkin

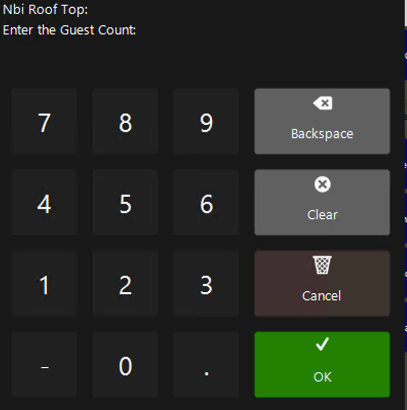
Enter in the Pax for the table
The Walkin will now be created and seated in NBI.
Creating Walkin from NBI:
Creating a Walkin from NBI will appear immeditly on SmartPOS in the section and service you have added it to in NBI.
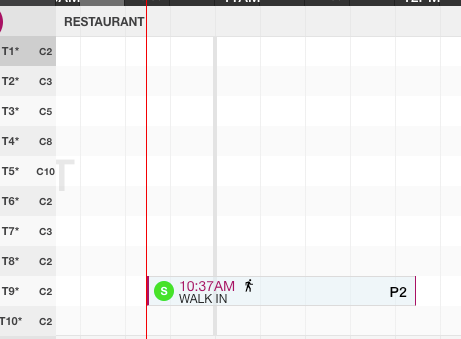
To stat adding items to the table, just select the Walkin from the list.

Completing booking and closing table is the same process as normal bookings.
Bookings with Payments in NBI:
Bookings that have had payments made in NBI of Full Payments or Deposit types, are automatically applied to the booking in SmartPOS and deducted from the bill total.
As soon as you open the table in SmartPOS, you will see the external payment appear on bookings that have had pre payment in NBI.
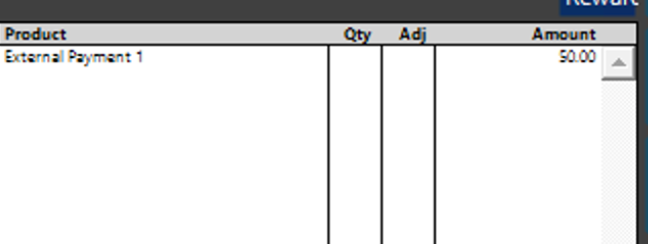
When you add items to the table, it deducts the pre payment and will only require payment of the remaining balance upon close.

Split bills:
Splitting bill payments can be done via SmartPOS, by selecting the Split Bill Screen button.

Enter in the number of split payments you would like to take.

You will now be taken to this screen, where you can allocate payment amount of the split amongst your customers.
External payments can also be accounted for here, if there was a pre payment on the booking via NBI.

Moving tables of bookings:
Moves can be facilitated in either SmartPOS or NBI - this works for Joined tables or single tables.
To do this via SmartPOS open the table you wish to move.
Select the More Table Functions button below.

Select the Transfer to Table button

Enter the table number you wish to transfer to - this will only allow transfer to table not already occupied.

You will then receive a confirmation of the table you are transferring from and to.

Another confirmation will appear asking if you want to notify the kitchen of the change

The next time you open the table to add additional items, the transfer of the bill will be allocated now to the new table.

Table will be move in NBI and in SmartPOS.
This will work the same in NBI, moving the table in NBI will instantly move the table in SmartPOS.
You will then see the booking appear assigned to new table/section and upon selection to add additional items to the table, you will receive the Performing local transfer dialogue like above.
Taking NBI Gift Cards as payment:
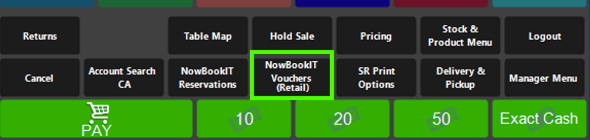
If you use NBI GiftCards, you are able to redeem the GiftCards via SmartPOS upon payment.
When you have selected the table for payment, select the button below.
Giftcards needs to be configured as part of the integration for this button to be added to the SmartPOS.
Enter in the Full Giftcard number or the last 4 characters from the Giftcard number to redeem. If there is a duplication, you can enter the last 5, 6, 7... etc digits.

-
If the Giftcard equals the total amount owing, the bill will be paid, the Giftcard will be redeemed in NBI and you will be able to close the table.
-
If the Giftcard is less than the total amount owing, you will then be asked to pay the remainder via another payment method to close the table and the Giftcard will be fully redeemed in NBI.
-
If the Giftcard is more than the total amount owing, it will make a partial redeem of the Giftcard in NBI and send a new email to the customer with their Giftcard and its remaining balance and the Giftcard will be partially redeemed in NBI. You can then close the table.