
The Standby List is for all services where there is no longer availability for the current day or days in the future. Customers can be added to the Standby List and IF a table becomes available for the date and time they have specified, the venue can notify them via email.
The Standby List button will appear in the Diary and the Booking Widget when maximum pax or maximum pax per interval is exceeded, block outs prevent booking, table resources are fully booked or a table is removed from an existing booking.
Once a customer has opted to add themselves to the Standby List from the widget, the booking will populate to the Standbly List in Diary. Venues can also add customers to the Standby List directly in the Diary.
Turn Standby on
The Standby list can be enabled/disabled via the Admin panel.
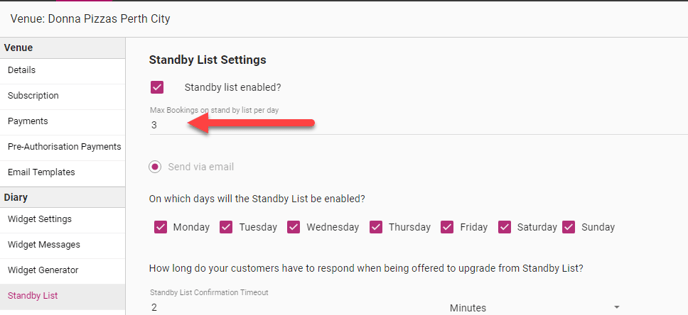
1. Go to the Admin Panel and select the ‘Standby List’ option from the left menu.
2. Select the ‘Standby List enabled' checkbox to turn the feature on.
3. Select which days the Standby List will be available and enter how long customers will have to respond to the confirmation email.

Restrict the number of Standby List bookings allowed per day
An option exists which allows the venue to restrict how many bookings can be added to the Standby List per day. This restriction only applies to online bookings made via the Widget, so the number is ignored if adding bookings to the Standby list via the Diary.
1 Enter a number in the ‘Max Bookings on Stand by list per day’ field. If this field is left blank then an unlimited amount of bookings can be added to the Standby list.
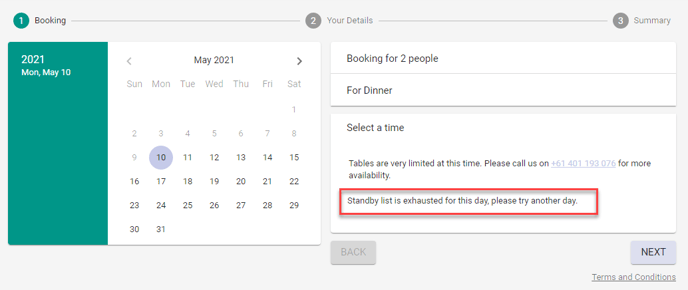
2. If a customer is attempting to book on a day where the Standby list is already full, the follwoing message will be displayed in the Widget:
Restrict a customer to one booking on Standby List
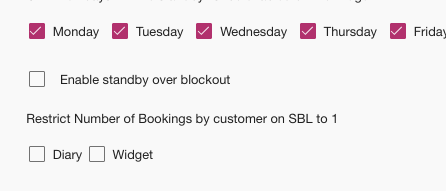
Below options will restrict a customer from booking multiple times to be on the Standby list on a single day. Therefore stopping the customer to occupy the entire Standby List on a single day . This option can be configured on Widget and Diary separately or together. A warning will pop up if the customer is trying to make multiple Standby List bookings
To enable this feature:
1.Go into Admin > Standby List > Then select the Diary or Widget or both based on Venues needs.
2.Click Save
Add a customer to the Standby List
1 Select the + button to make a new booking
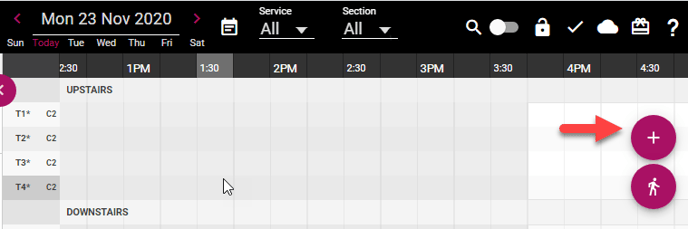
2. The Standby List button will appear only if there is no table availability for the selected time slot. Note that you can also reveal the Standby List button by removing a table from an existing booking.
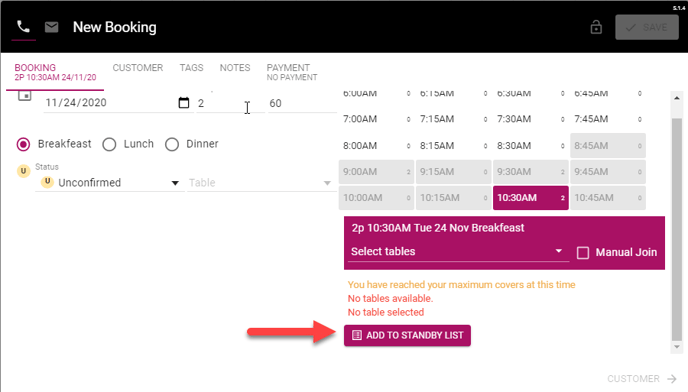
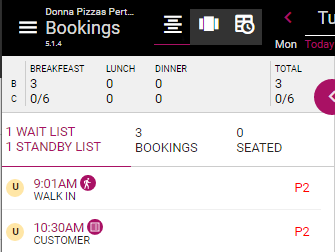
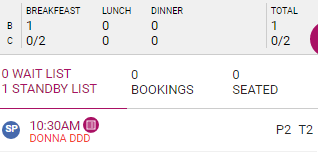
3. Selecting the button will add the customer to the shared Standby List and Waitlist tab. Waitlist bookings are displayed first in the list, as this is what most venues use on a daily basis. Standy bookings are ordered by the date and time stamp of creation so that the priority is preserved. The icons next to the bookings differ if the booking is on the Waitlist or the Standby List.
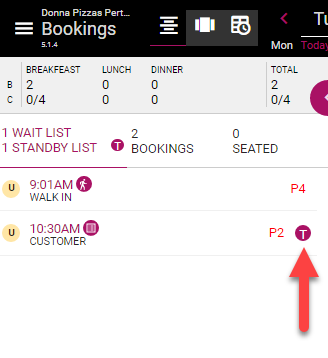
Move a customer from the Standby List
Once a table becomes available, the booking will display a small T next to the booking. The customer can then be notified via email and either confirm or cancel their booking.
1 Open the booking from the Standby List.
2. Select the table you want to allocate to the Standby booking.
Seat and confirm sends the email and link to the customer and they are then able to confirm within the time frame set in the Admin panel.
Seat for will seat the customer and no email will be sent.
Cancel Booking will cancel the booking and add to the Cancel tab at the bottom of the screen.
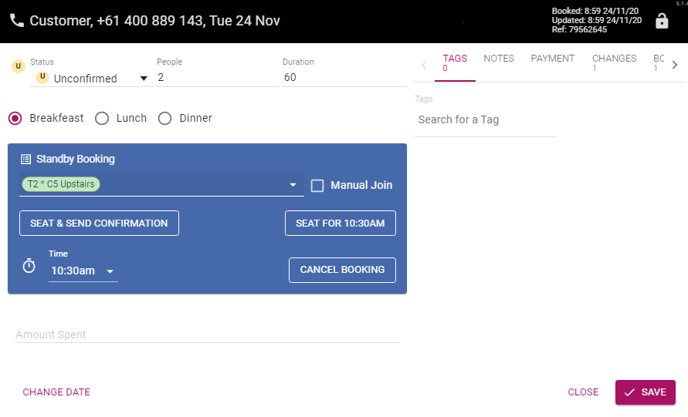
3. You can edit the time or change the date of the Standby booking using the Time and Change Date options.
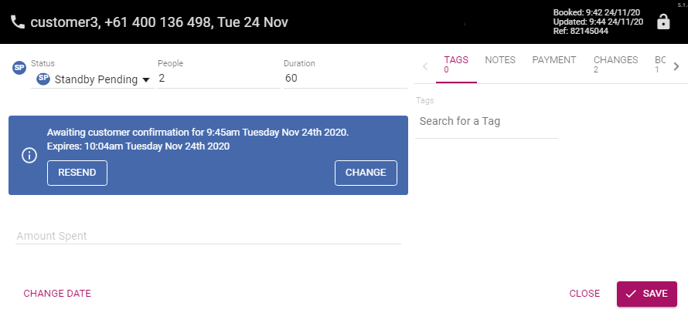
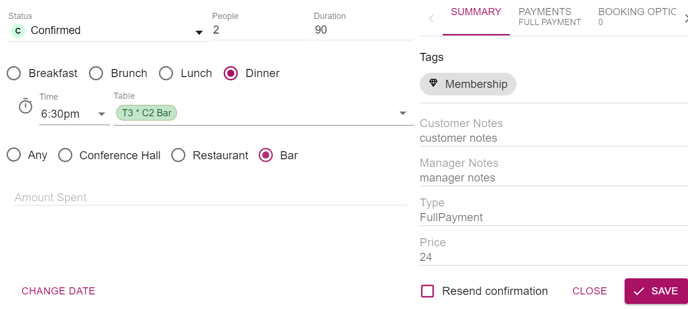
4. Once the confirmation email has been sent, the booking is also displayed in the Diary with a status of Standby Pending. When the customer confirms via the link in the email, the booking is removed from the Standby List and the status of the booking in the Diary changes to Confirmed.

5. If required, the Status of the booking can be changed to seat, cancel or confirm a booking in the Standby List. Selecting Seat or Confirm will move the booking to the Diary for the time slot and table selected.

6. When a confirmation email has been sent to a booking on the Standby List, opening the booking will indicate when the link will expire.
Expired Confirmation Links
When the confirmation link has expired, the booking will display as red in the Standby List. Opening the booking will also indicate that the link has expired and the customer can no longer confirm online. Venues can now cancel the booking and move to the next customer on the Standby List.

Payments and the Standby List
Payments added to a service (payments and booking options) are attached to bookings added to the Standby List via the Diary only. If customers add themselves to the Standby List via the online booking widget, then payments are removed and need to be added to the booking manually. A booking on the Standby List cannot be confirmed unless the payment process has been completed.
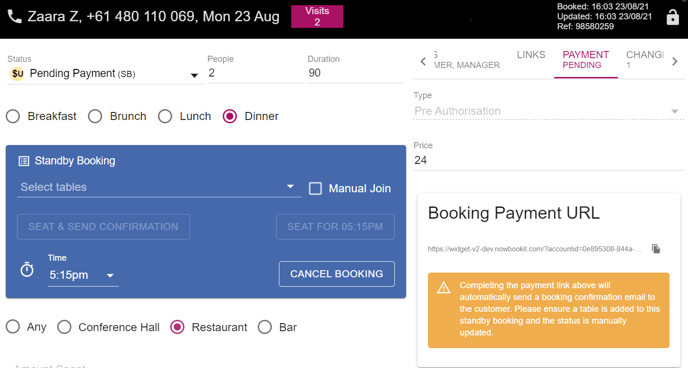
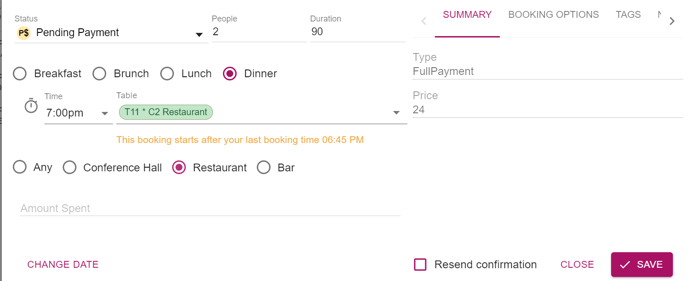
If a service has a payment type like deposit, full payment, pre-auth or booking options in the service and a booking is added to the Standby List from the Diary for that service, then the booking gets saved in ‘Pending Payment (SB)’ status as shown below.
Once a booking is ‘Pending Payment’ status on Standby List, then payment can be made in the following way:
1. Open the booking from the Standby List, allocate the table and click ‘Seat & Send Confirmation’.
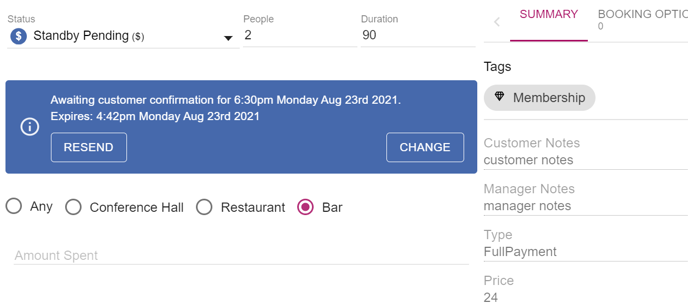
2. A standby list request confirmation email is sent to the customer and the booking status changes to ‘Standby Pending’ status and also lands in the Diary.
3. Open the email and click on ‘Confirm’ link
4. The standby list confirmation widget is launched with a ‘Pay Now’ button
5. Click on ‘Pay Now’ and provide the CC details and select ‘Terms & Conditions’ and click 'Next' to complete the payment

6. The booking is now moved from the ‘Standby List’ to the ‘Bookings’ List on the Diary with a ‘Confirmed’ status
Move a booking from SBL to Bookings List using the Seat button :
When a booking is on the Standby List, then the booking can be moved to the Bookings List in the following way:
1. Create a booking in SBL
2. Allocate a table and click on ‘Seat for xx.xx’
3. The booking moves from SBL to Bookings List and is saved in ‘Pending Payment’ status
4. Navigate to payment tab and click on ‘Send Link’
5. A reservation payment mail is sent to the customers inbox with the payment link.
6. Click on the payment link and complete the payment process.
7. The booking is now confirmed.
Cancellation Toast message:
When a customer cancels via email / widget a toast message appears in the Diary to inform the venue a SBL cancellation occurred. This will help the venues to be aware of the SBL cancellation.
