Facebook Integration
Connect your Now Book It account to Facebook (Meta)
Trackable Events Bookings:
There are a number of traceable events with the NBI Booking Widget these include:
-
Page View
-
Date Selected
-
Time Selected
-
Booking Times
-
Booking Date and Covers
-
Covers Updated
-
Customer Details
-
Payment Details
-
Confirm Payment Details
-
Payment Confirmation
-
Booking Paid
-
Booking Summary
-
Payment Booking Cancelled
-
Booking Cancelled
-
Thank You
For any Paid Bookings, "Booking Confirmed" is the conversion step.
For any Non-Paid Bookings, "Thank You" is the conversion step.
Trackable Events Giftcards:
There are a number of traceable events with the NBI Gift Card Widget these include:
-
Page View
-
Card Selection
-
Customer Details
-
Recipient Details
-
Payment Details
-
Payment Complete - This event indicates that the Gift Card has been Purchased and therefore would represent a conversion.
Defined Web events:
You will need to define your web events as FB/Meta only allows for 8 to be tracked.

Step-by-step guide for Now Book It Facebook integration
Setting up your Facebook Pixel:
First you need to set up your Facebook pixel to attach to your campaigns and to receive a Pixel ID number, that you can add in to the Now Book It Admin page to enable the integrations.
-
To set up your Facebook Pixel you can find further details here:
-
https://en-gb.facebook.com/business/help/952192354843755
-
-
Once your Pixel has been created you will need to locate your Pixel ID
-
Your Pixel ID is located in Data sources

Adding Pixel ID to Now Book It Admin:
Now you will need to log in to Now Book It Admin page to add your pixel to enable the integration between NBI and Facebook.
-
Log in to Now Book It https://admin.nowbookit.com (if you do not have a log in you will need to speak to the venue about gaining access)
-
Locate under the Diary heading > Integrations, you will see the below area when you can enter in your Pixel ID
-
For Gift Cards add the Pixel ID under the Gift Cards heading > Integrations

Generating events with your Now Book It Widget:
Next we need to generate events with the widget to ensure that the events are being recorded correctly and you can add them to your Ad Campaigns.
-
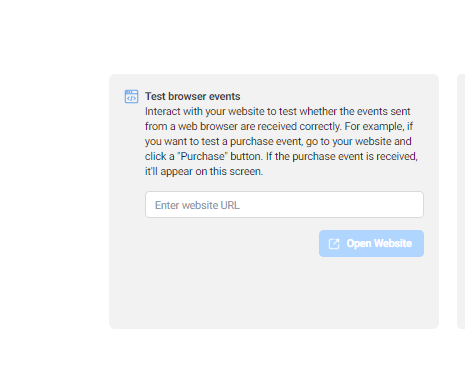
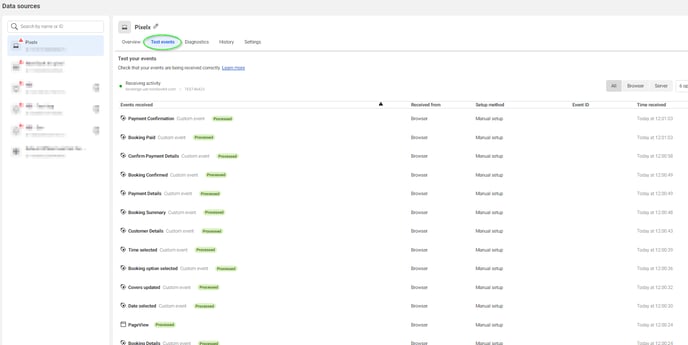
Go to the Data sources area and select Test events
-
Copy your widget URL in to the test area

3. Create a couple of test bookings, as the widget is used more and customers are adding payment details (for pre auths etc) more events will become available for you to track.
4. Once you have created a few test bookings you will see them appear in the test area to confirm that the pixel is working.

5. For the events you would like to make customer conversions for - select them to show the content category as this will be needed to set up your conversions.


Creating Custom Conversions to track successful bookings:
Please Note: You can also use the event Payment Complete in the case of Giftcards, to track purchase conversions.
-
Go to the Custom Conversions area
-
Select Create Custom Conversion as shown below

-
Name you custom conversion
-
Select your Pixel as the data source
-
Select the event you would like to make the custom conversion for from the list

7. From the Rules area, Select Event Parameters and Content category
8. Add the content category which you have from the steps above - this will be the name of the venue
9. Complete the set up with values etc if you wish to use them
10. Save the custom conversion
11. These conversions can take some time (hours) to be surfaced in FB, so you may not see them right away.
12. You will then start to see the events be tracked against your conversions and you can then add these to your campaigns.

Please note: Custom conversions take sometimes take a 3-6 hours to show up in the conversions area
For any further information on Facebook, Ads, Business Manager, Pixels you will need to consult their Webiste and help pages.
To troubleshoot your pixel please see https://blog.hootsuite.com/facebook-pixel/ for an plug in to assist
%20Dark%20Background.png?width=100&height=75&name=Now%20Book%20It%20Logo%20Mono%20(Horizontal)%20Dark%20Background.png)