
This article will walk you through how to set up your Booking Options, and your parameters around the number of pax mandated to choose that option when making a booking through your widget.
- Create the booking options you'll need. You can find a walk through on that here.
- You will then add the booking option to a day in your Schedule, by clicking "Add Temporary Booking Option," shown here:

Once you click on that option, it will expand to the box shown here:
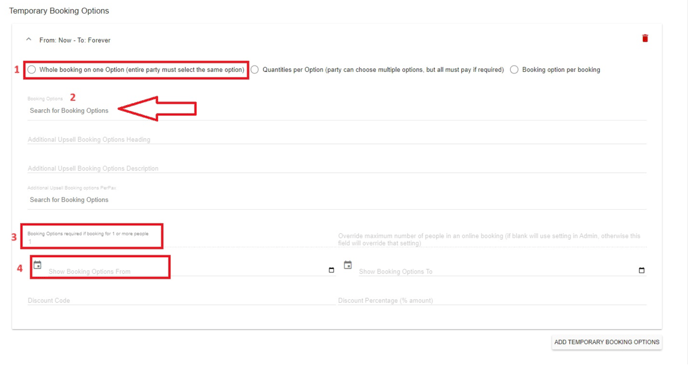
- Determine how you want this option presented.
- Whole Booking - everyone in the booking must select the same option
- Quantities per Option - everyone can select different options, but payment is required
- Booking option per booking - all options open to all customers booking
- The next line down reading Search for Booking Options, click your mouse on this line and the Booking Option you have created will appear, select it to add it onto the line.
- Enter the pax (number of customers) you are want this Booking Option to apply to.
- Add the start date as the date you want this booking option to apply from, and an end date for when the booking will be removed from options shown.
- Click Save at the bottom right corner